Intro
Ayon dev mode was introduced to ease pipeline client code development, however it sill has some limitations, More about that later.
Ayon dev enables users to:
- change addons versions within the dev bundle
- have explicit addon paths
- make it available for particular users
Here is how to setup Ayon dev mode.
Enable Ayon Developer Mode
Follow the following steps
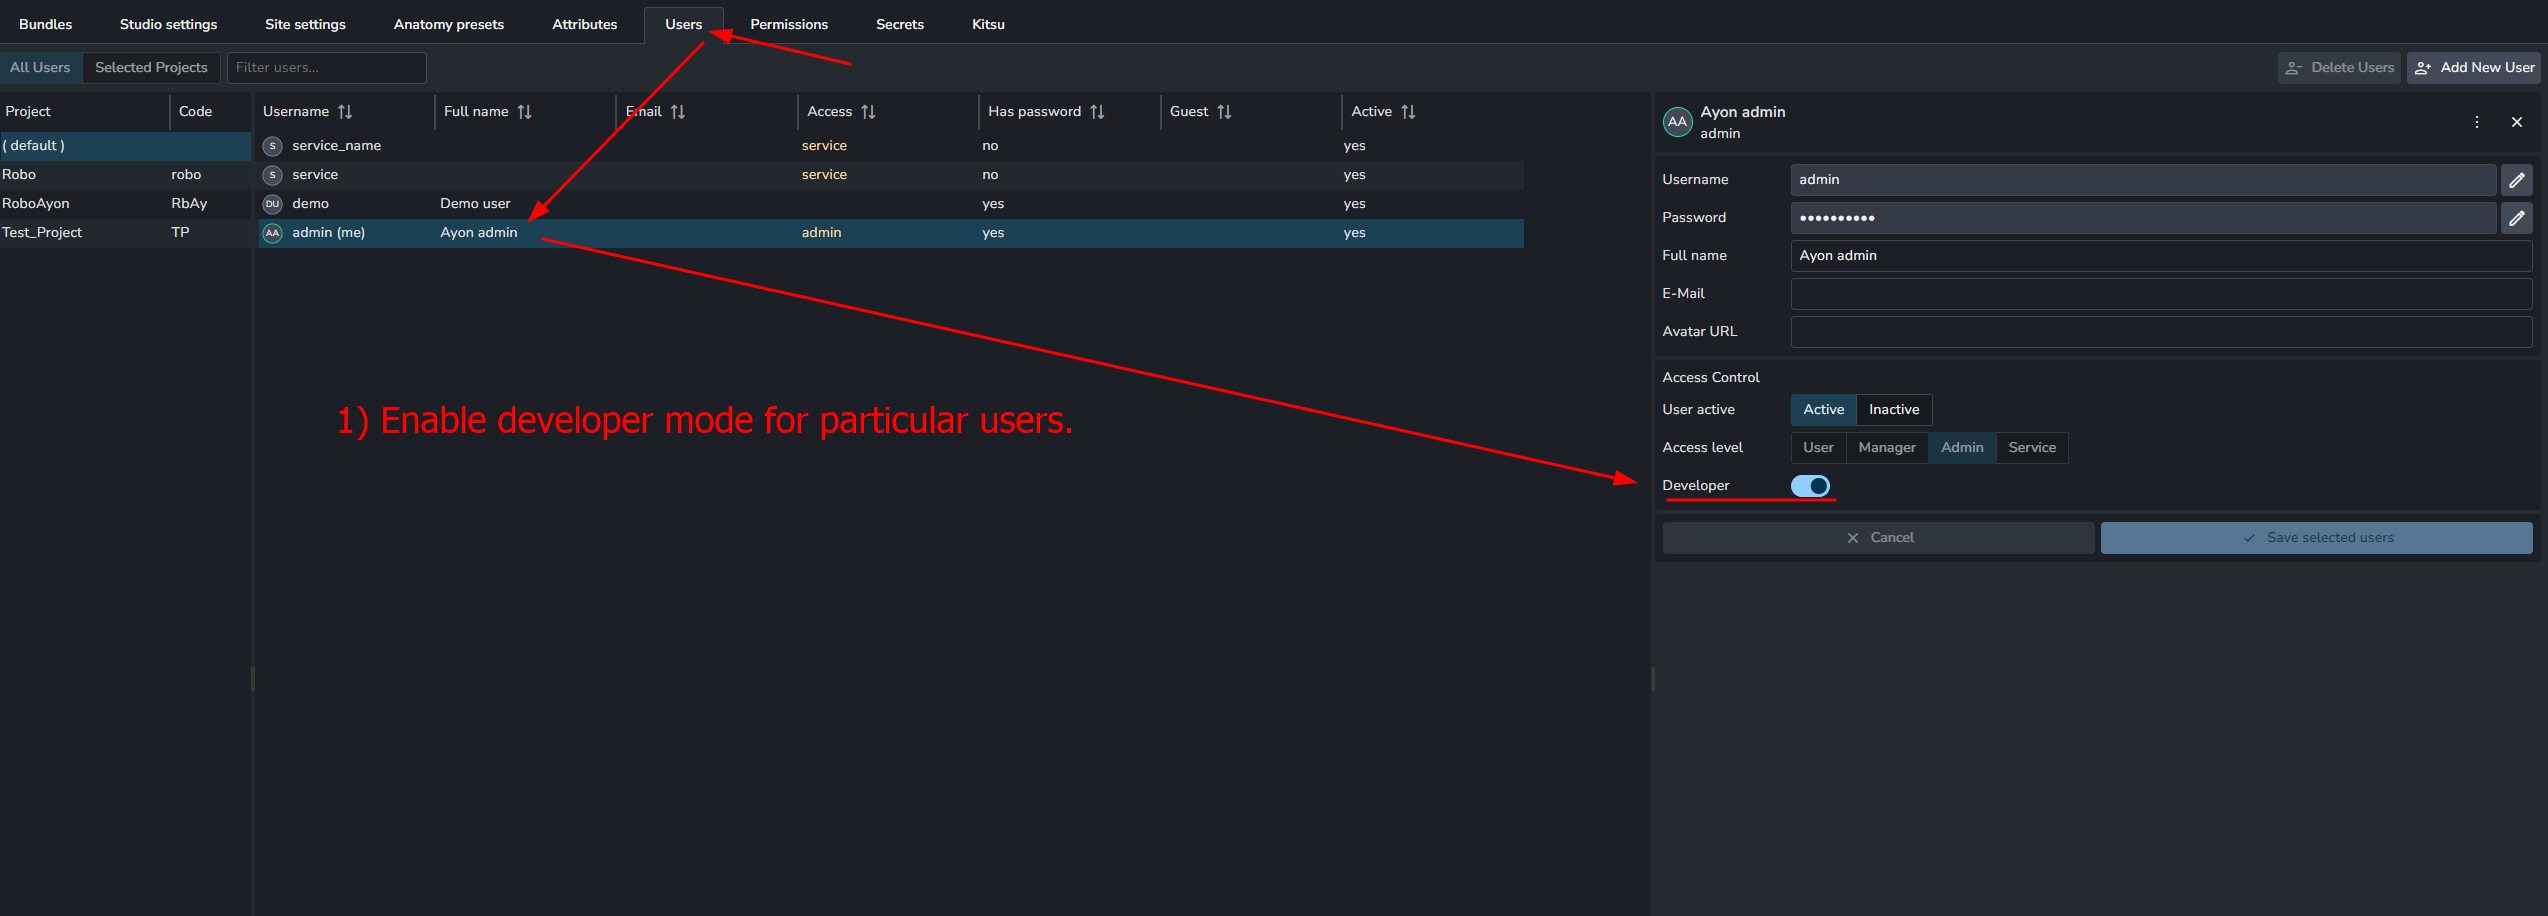
-
Enable developer mode for particular users.
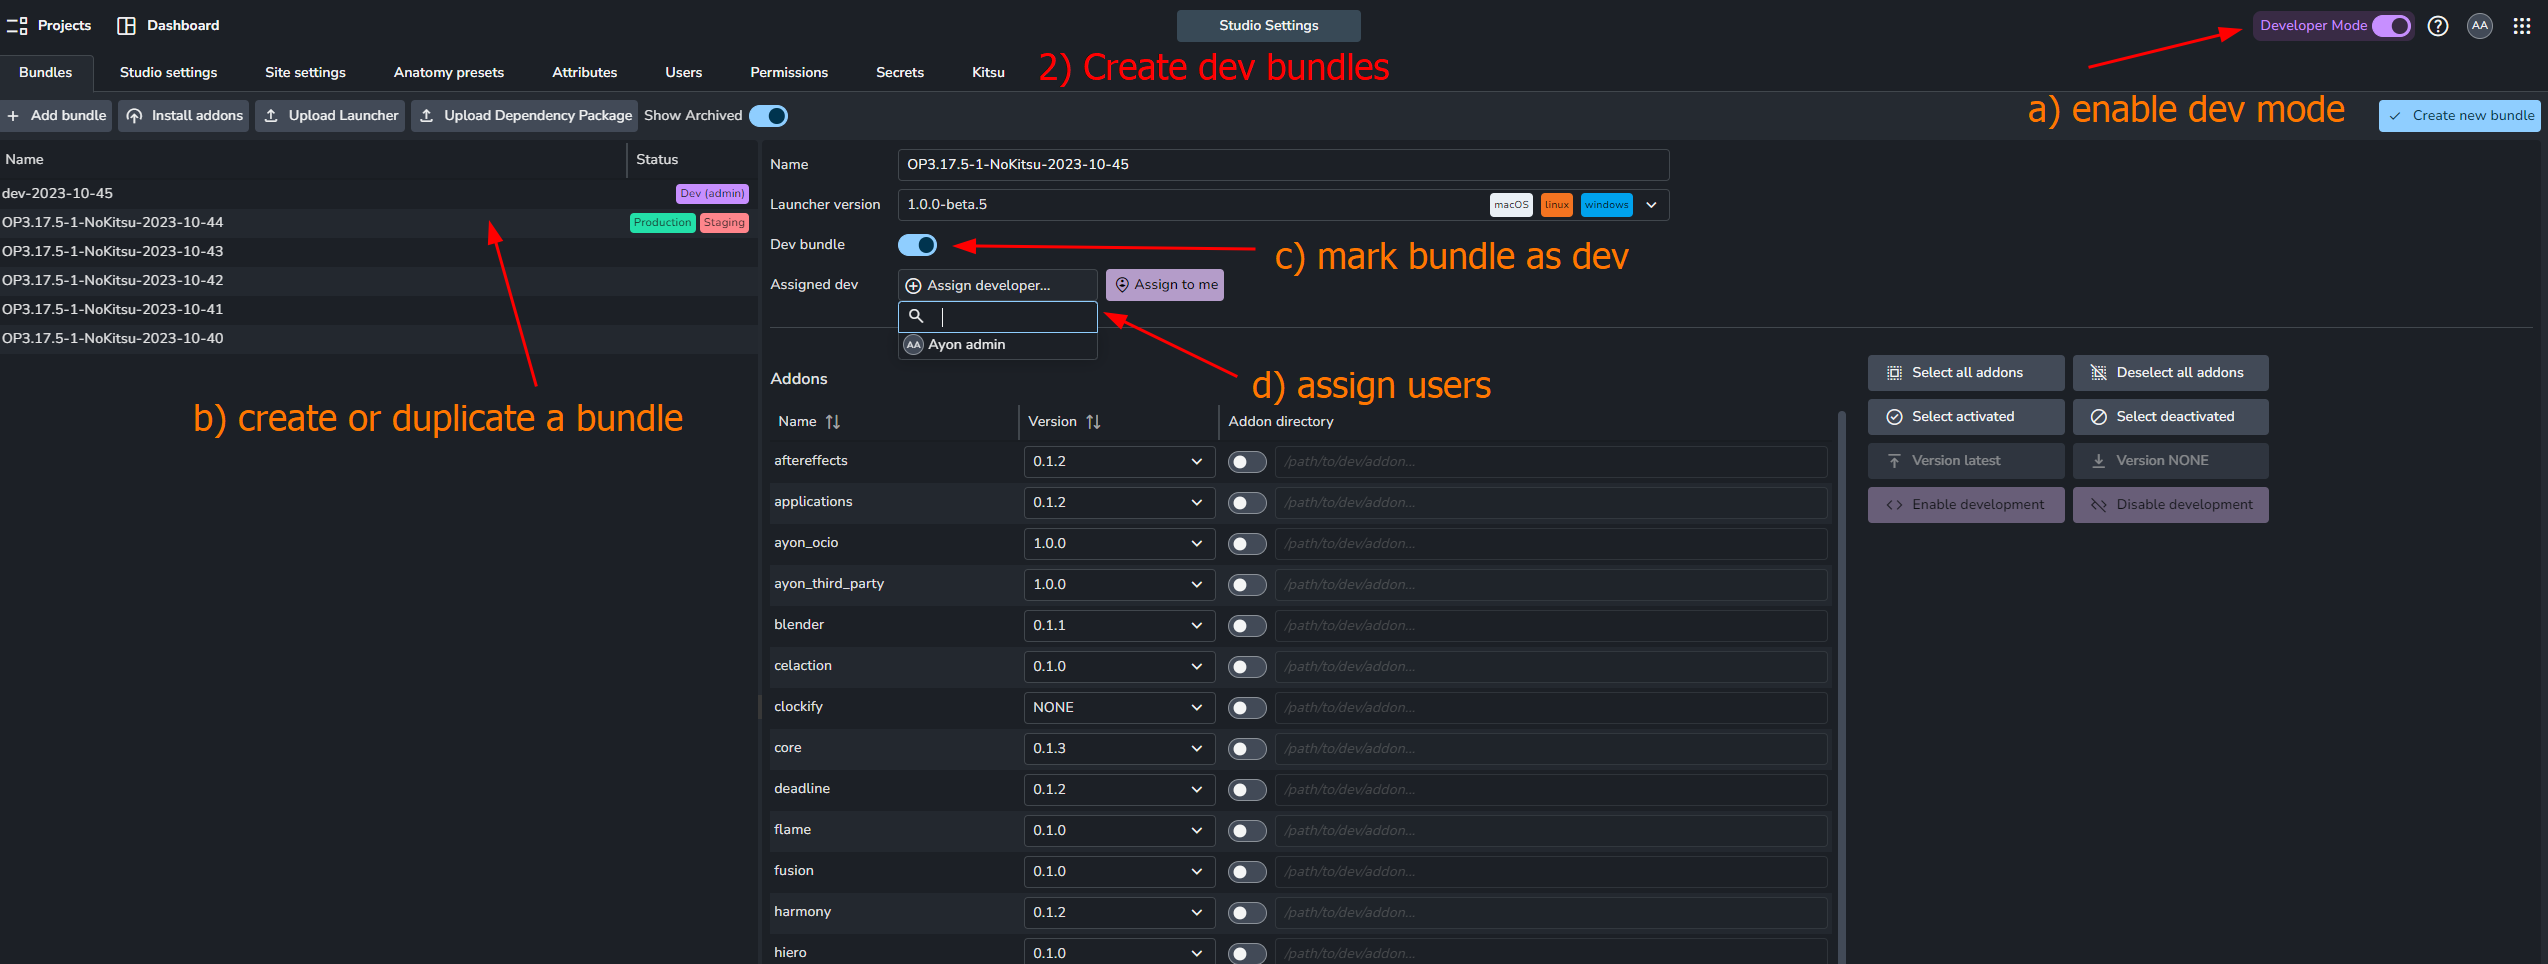
-
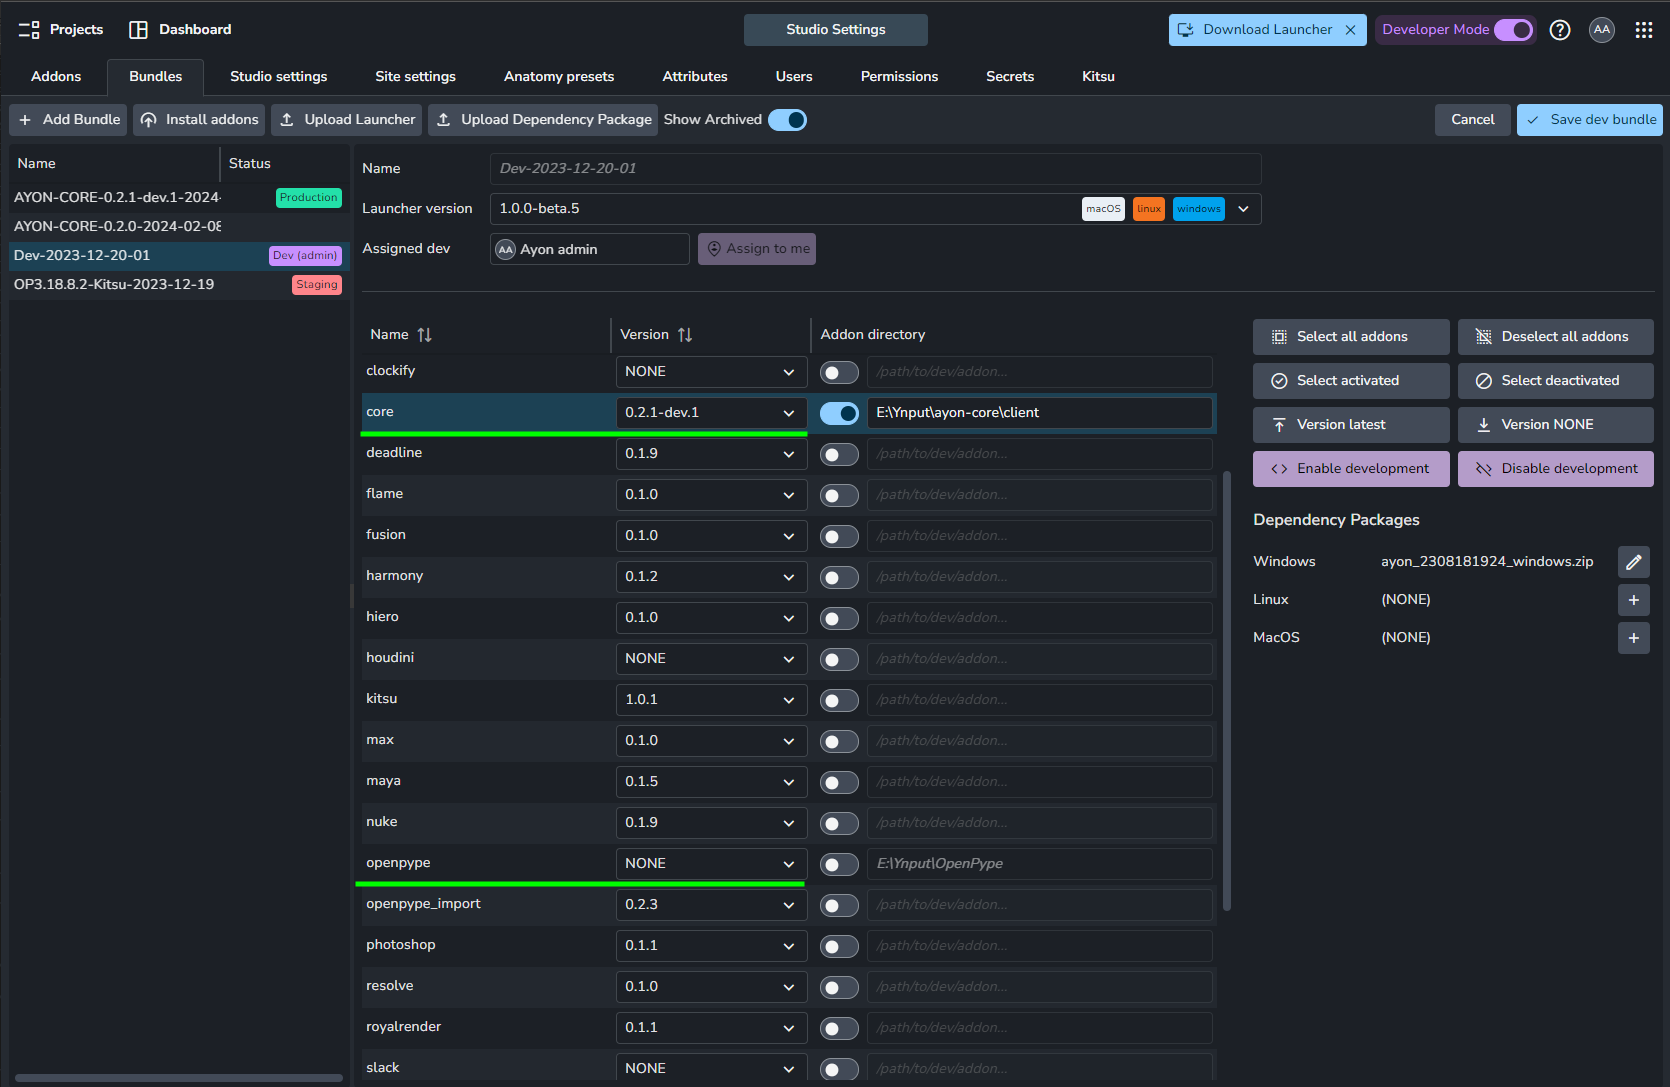
Create a bundle and set it as Dev. Dev bundles will only be displayed if the user has Developer Mode enabled on the AYON web frontend.
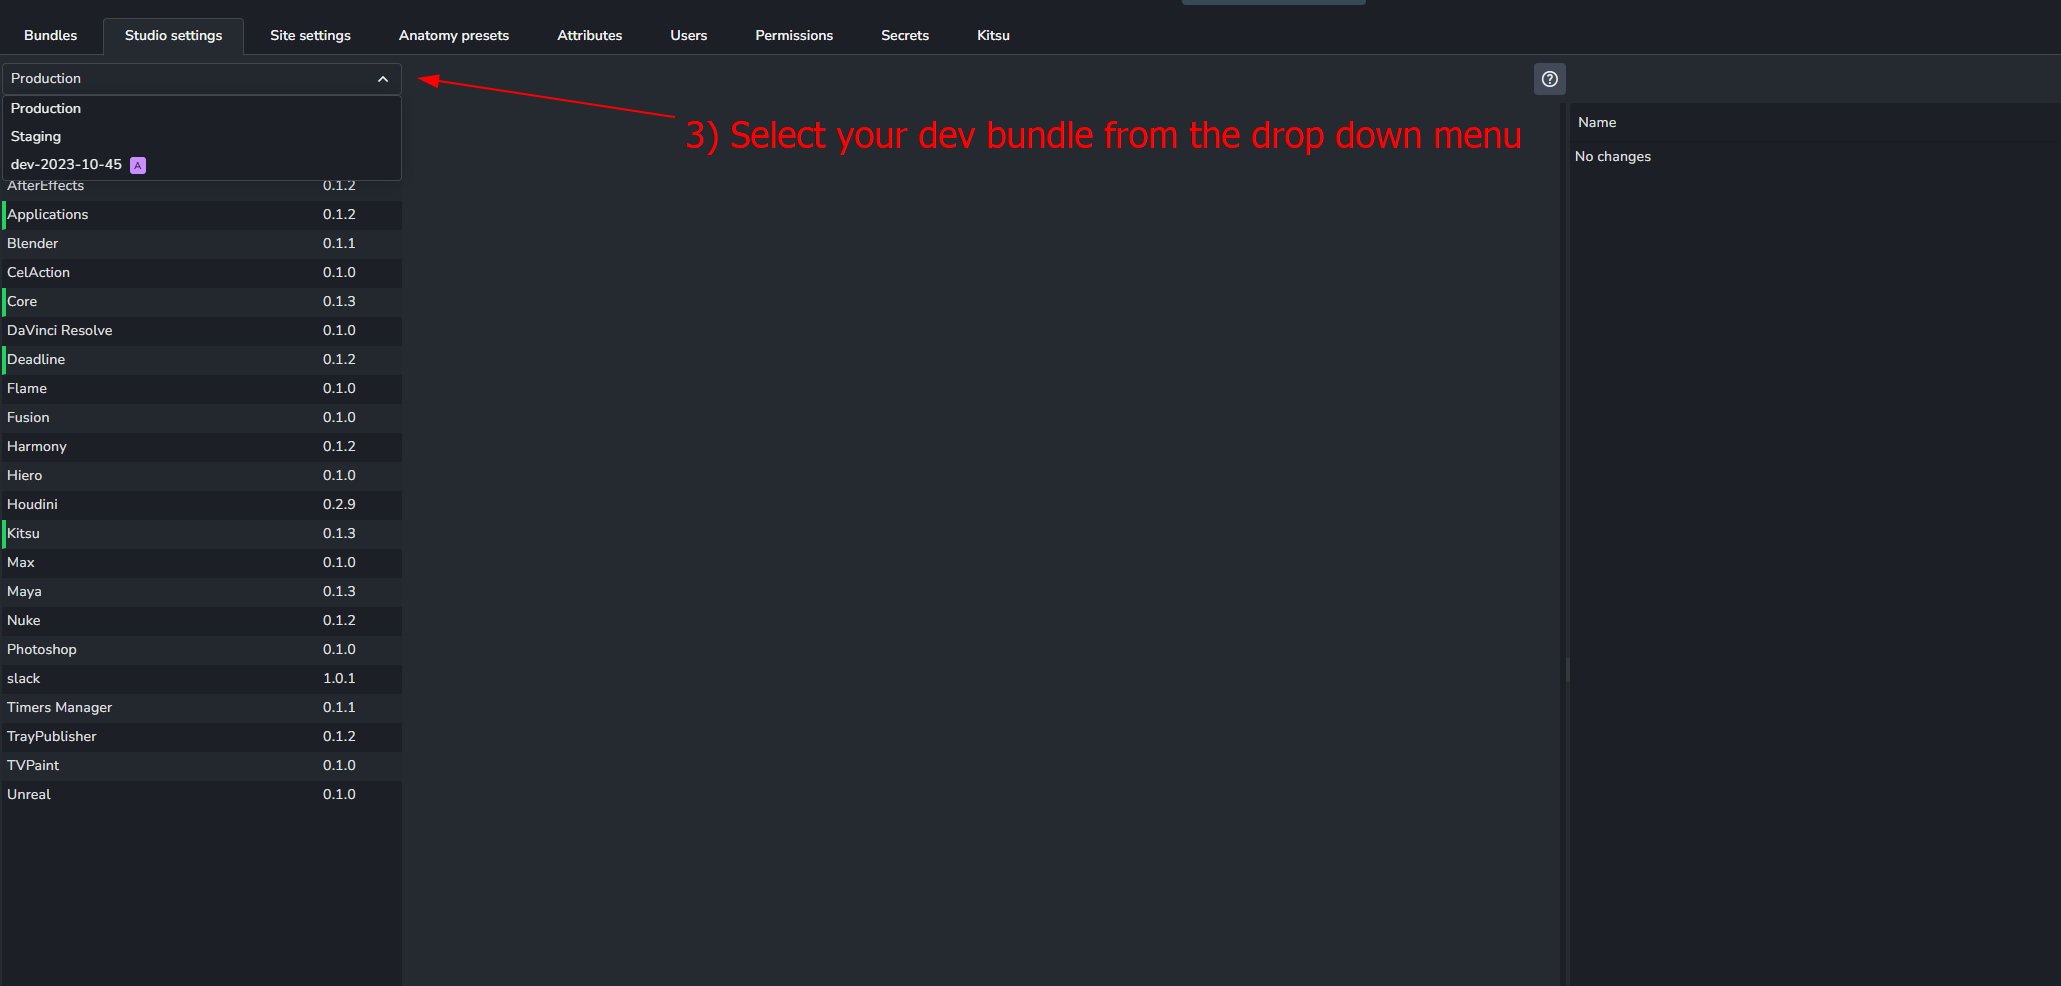
-
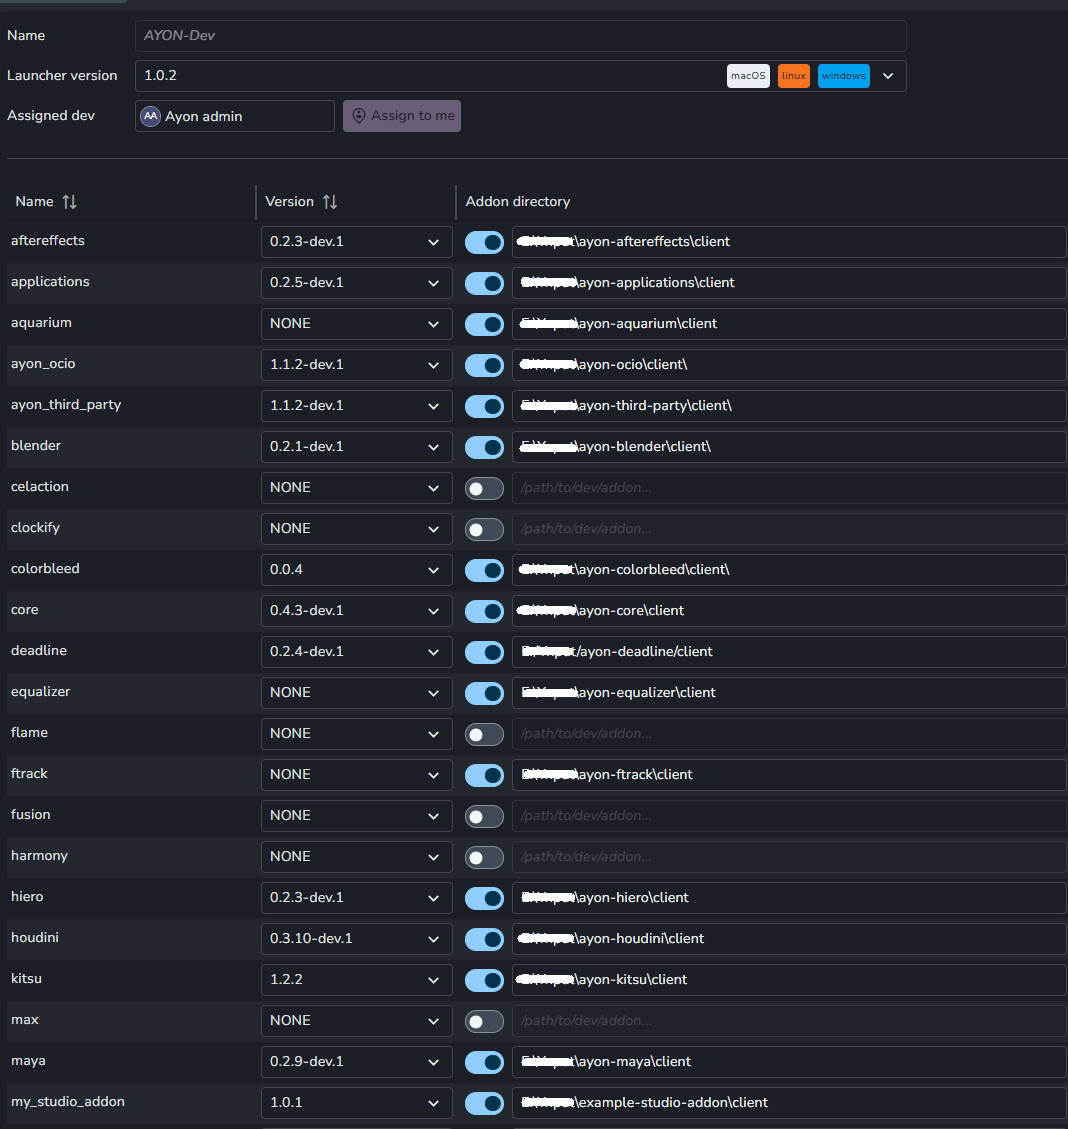
Select your dev bundle, to start editing its settings
Caution: Don’t forget to set your Dev Bundle settings!
Hint: you may copy settings from other bundles as follows:
Ayon Launcher in Dev Mode
This is possible by running Ayon launcher live from Ayon launcher Repo
Get Ayon Launcher Repo
I’m on windows.
In power shell
git clone https://github.com/ynput/ayon-launcher.git
cd ayon-launcher
tools\manage.ps1
tools\manage.ps1 --create-env
tools\manage.ps1 --install-runtime-dependencies
Run Ayon Launcher in Dev Mode
Note: When launching the AYON launcher in dev mode, it will use the dev bundle for the assigned admin user.
From your Ayon Launcher directory, run :
Windows: use either one of these:
.\tools\manage.ps1 run --use-dev
or.\tools\ayon_console.bat --use-dev
Linux & macOS:
./tools/make.sh run --use-dev
Checkpoint
By this step, you are able to:
- Run Ayon Launcher in Dev mode.
- Create dev bundle.
- Change addons versions in your dev bundle as desired.
Explicit Addon Paths
As mentioned earlier, Ayon dev mode was introduced to ease pipeline client code development.
And, in dev bundle settings we expose addons’ client code path which is the client dir path inside the clones of addons repo on your disk.
Note, you are still required to upload their addon zip files to update their settings on the server.
Note about deprecated OpenPype addon
We no longer use it.
We used to use it before migrating the pipeline code to ayon-core and then migrating each DCC integration to its dedicated addon.
ANYWAY, OpenPype addon will conflict with ayon-core.
Therefore, Set OpenPype to None or even consider uninstalling it from your server.
Create addon files
This step provides more info about creating Addon files.
We use the following commands to create addon files.
In any addon repo directory:
To export an addon: --output is optional
python create_package.py --output "E:/output_dir"
Checkpoint
By this step, you are able to work on addons’ code locally on your machine.
Push addons to users
Well, mostly you have done it while developing when you uploaded the addon zip.
But, let add one more tip:
you may would like to add your studio name to differentiate your addon from official addon releases e.g. core-0.2.1+mycoolstudio.1
Also, you can uninstall it and re-install it again.
Ayon server wont allow addon un-installation if it’s used in any bundles (even if they were dev bundles)
So, you may need to set the version toNonein your dev bundle.
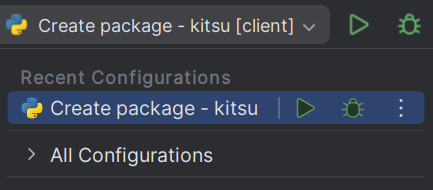
Tip
you can define different configurations in PyCharm or tasks in VS Code in to create packages automatically.
- VS Code Example | Github
- Pycharm Example
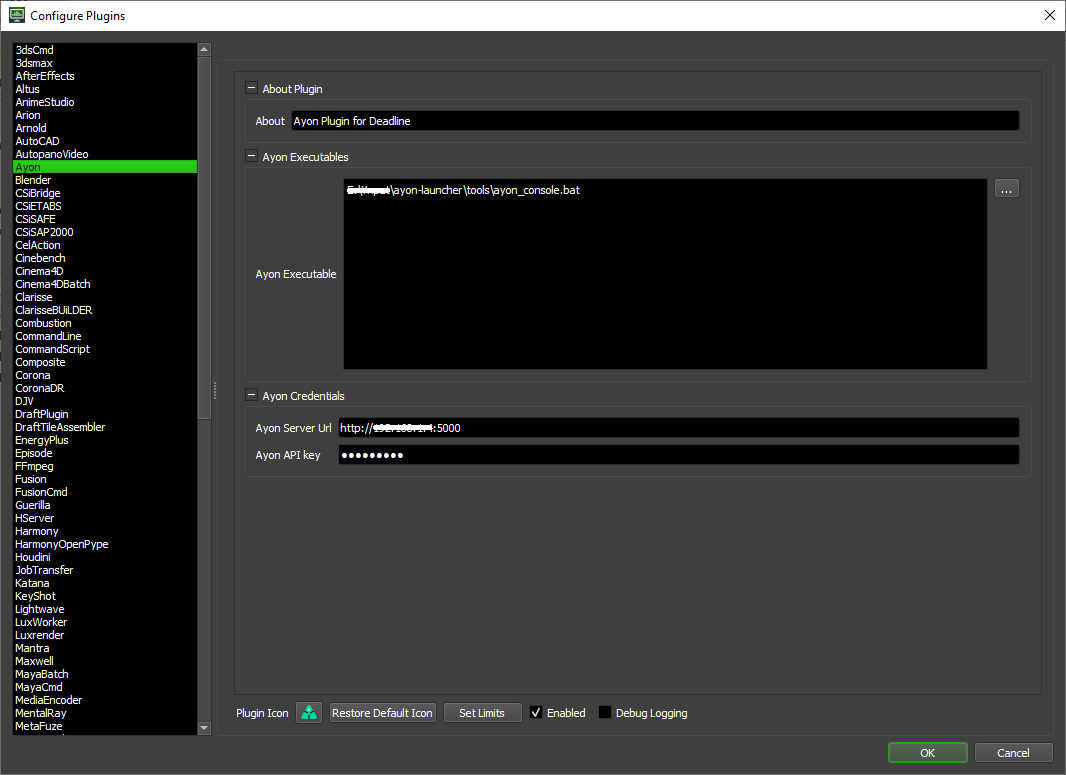
Ayon Dev and Deadline
For windows:
you can use live Ayon launcher with deadline as mentioned in AYON / Openpype Deadline Setup by using the ayon_console.bat, it’s in tools folder inside Ayon Launcher Repo.